How to Create Your Own GIFs for Brand Awareness

Did you know you can make your own GIFs and use them on Facebook, in your emails, in your Messenger messages, everywhere? GIFs (stands for graphics interchange format for those nerds who want to know) can certainly add some fun to your typical branding and social media presence.

And, what’s more, your customers can also use them!
In the last 30 days, we’ve had 286.7K views!

Believe it or not, my top GIF has been viewed almost 80,000 times alone - and I’ve only been creating my own GIFs since the start of the year.
April 17, 2021 Update:
In the last month since this original post, we've had a further 3.8 MILLION views, to a total of
4.3M since the start of the year!


And…. using Giphy or Tenor is actually FREE!

OK, so let’s get into the nitty gritty of how to create your own branded GIFs.
Step 1: Brainstorm First,
you need to think about the types of short videos that can be made into your own GIFs. GIFs that get used the most are often ones that portray a reaction. These types of mini-videos can capture a feeling better than just words.
Get your team on board and do some brainstorming together about the types of GIFs you could make. Think about your brand values and what you want to highlight.
Here are a few GIF ideas:
A reaction to smelling your restaurant’s food (eyes closed, breathing in deeply)
A reaction to something one of your customers said that is totally WRONG
An excited expression with a customer unboxing your product
Trendy statements people in your industry are saying
Casual statements (for example, “you are not alone” or “it’s almost friday!” or “i agree”)
It’s also important to think about:
Captions. Does your video need a caption to help it hit harder or make more sense? Many times CLARITY is more effective than CUTE. What words will make your GIF relatable, useful or trending?
Tags. Tags for your GIFs are the words that people will use to find your GIF, kinda like hashtags on Instagram or Twitter (for example, “delicious” or “excited” or “perfect” or “rough day”... also include your brand and your name in there as well).
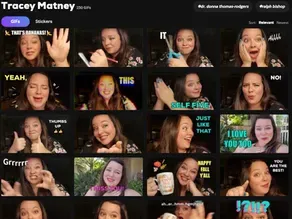
*TRY THIS: Search your favorite platform in the GIFs section for “Tracey Matney” and you’ll see all of mine come up for inspiration…or take a look at these on Giphy:

The next step is to film the videos. You might just like to record a couple of GIFs to start with, or go all out and film the whole list ← this is my preference because once I start, I’m on a roll.
Make sure your videos have good lighting and the background isn’t too cluttered. Filming on your phone is perfect! I literally just set my phone up on the kitchen counter with all the lights off except the one right in front of my face, so the background was black and my GIFs turned out better. And, the dark background helped so the focus was on the facial expression and the text showed up better.
Step 3: Get set up with Giphy
Ok, once you create all of your own GIF mini-videos, you’ll need to publish them as GIFs. There are two main platforms to get your GIFs out there. We started with Tenor, but now prefer Giphy as we were able to get ourselves listed as a verified channel (Giphy actually explains their step-by-step verification process here).

Here are some important things to take note of in order to be verified:
“Brands are required to use an email address with a company domain that matches the applying username, ex: jane@username.com.
If you are applying for a Brand channel, your GIPHY username must accurately reflect the name of your business (numbers, underscores and other special characters are discouraged here). Visit "Change your GIPHY Username" for more information.” -Giphy
You’ll need to create your free account first, then create a minimum of 5 GIFs before you can apply to be a verified channel.
Step 4: Create your GIFs!
Once you’ve created an account, you can go ahead and get started creating your GIFs inside of Giphy. Even if you don’t end up as a verified channel, you can still use all your GIFs in marketing and on Facebook. (If you’re not verified, it just means people won’t be able to search for your GIFs as easily).
> go to “create”
> Select your video to upload.
> Trim your video using the sliders.
> Then get decorating! (use text, colours, stickers etc. to make your GIF shine)
> Then add your website as the source for the GIF, add in your tags (as above) and away you go!
Step 5: Using your GIFs
Go ahead and copy the link to your GIF, and get to sharing it! Use them to send your GIFs out to your email list, on Facebook, Twitter, etc!
You’ll also be able to search for your GIF when you comment or post on Facebook. You’ll be able to find it by searching your brand name tag and one of the other key words you used. The better your GIFs are, the more they will get shared!
Surprisingly, I get texted all the time when friends see my GIFs out in the wild used by people I don’t know. It’s so validating!

I hope you enjoyed learning about how my team and I make custom branded GIFs at Victory Points Social. Shoutout to Sarah Holder for taking ownership of this project!
It’s just another little way to add some fun to your business’s branding.

Well, what can I say except, “you’re welcome!” 😆
Xx Tracey
PS - Not very tech savvy and need help? Looking for someone to set up all of your own GIFs FOR you? (We do that… book a 30-minute discovery call here).

